BackerClub was not incentivized for this review. The Clever Stick crowdfunding project was on BackerClub for a paid promotion, but we backed the project with our own money and the Clever Stick creator had no idea this review was coming. This is just our personal opinion after using the poles for a month.
The Clever Stick claims its name because it’s a trekking pole that can also turn into a seat, tripod, selfie stick, and more. When I saw this Kickstarter project come across BackerClub, I was extremely interested in it because of its features. My husband and I are avid hikers, climbers, and amateur photographers in the North Carolina wilderness, so if you’re adventurous like us, I’m sure you can imagine why this held such appeal!
In particular, we were most interested in the seat capability. On many of our hikes and climbs, we’ve wanted a lightweight seat for a more enjoyable lunch time but we’ve disliked the strategy of packing an entirely separate chair into our packs. With these trekking poles, we only need to add 2 lightweight components to our arsenal (the seat fabric and the pole joiner) and we’re good to go.
The Basics
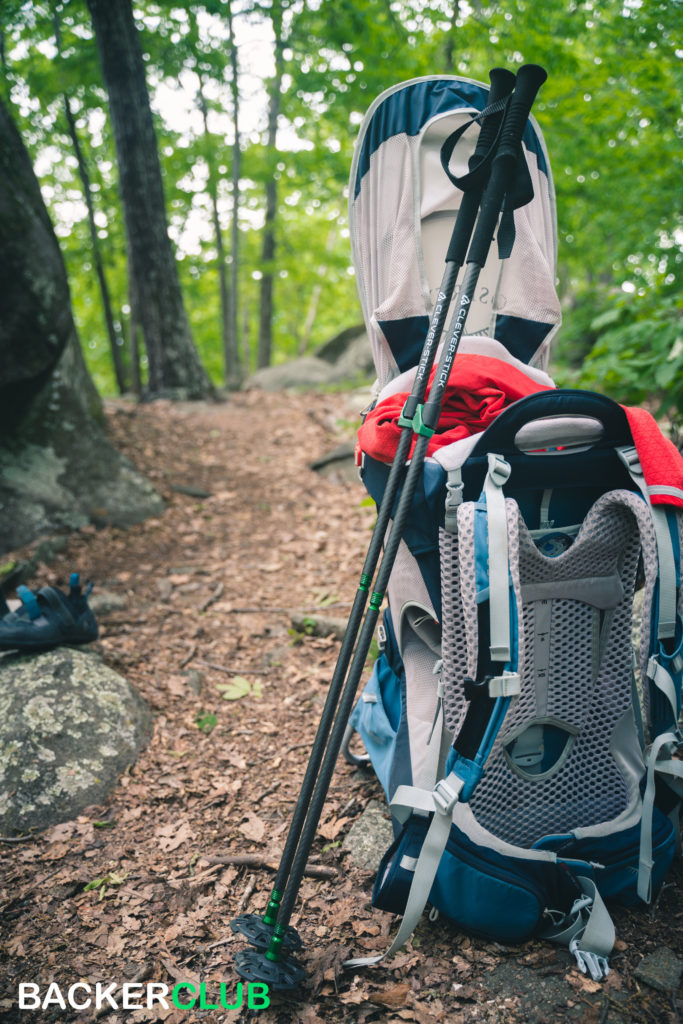
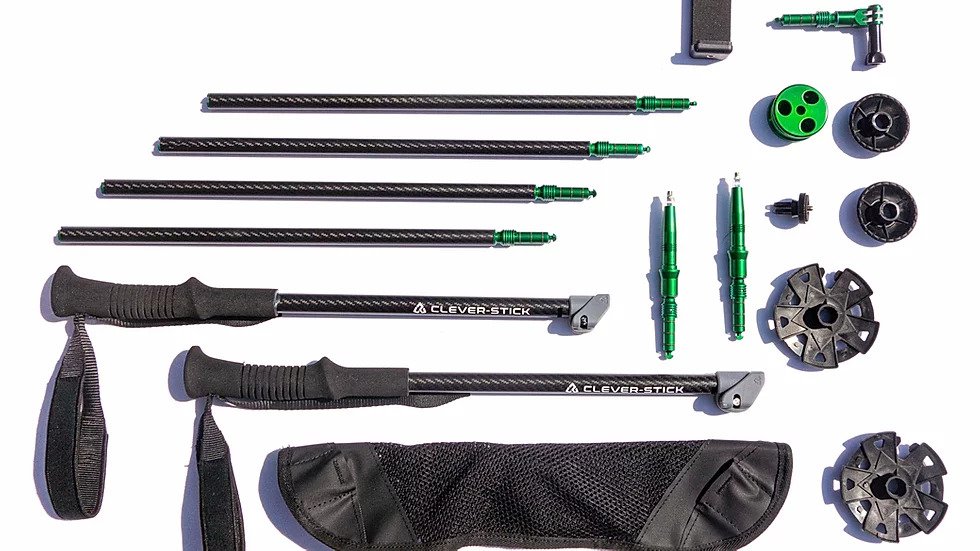
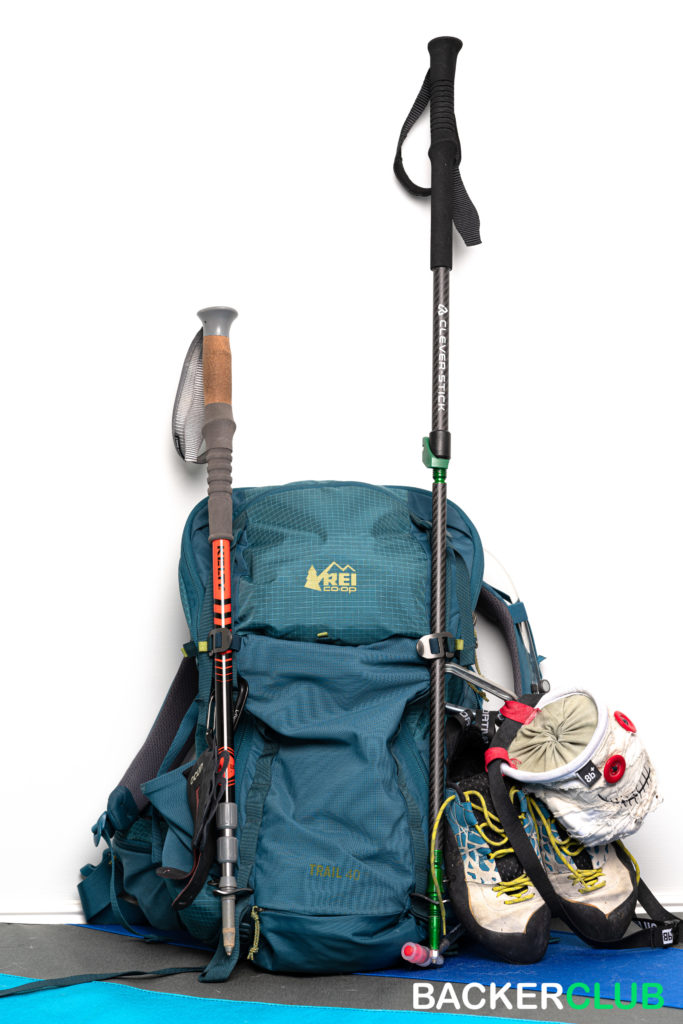
To start, the poles came disassembled and wrapped in the seat fabric with all ancillary pieces in a small green travel pouch. Our poles didn’t come with written instructions (although a hand written letter was included – a nice gesture), but you can check out the company’s website for a manual-as-a-webpage that shows you some basics. We purchased the long version of the poles, and everything feels pretty top notch.
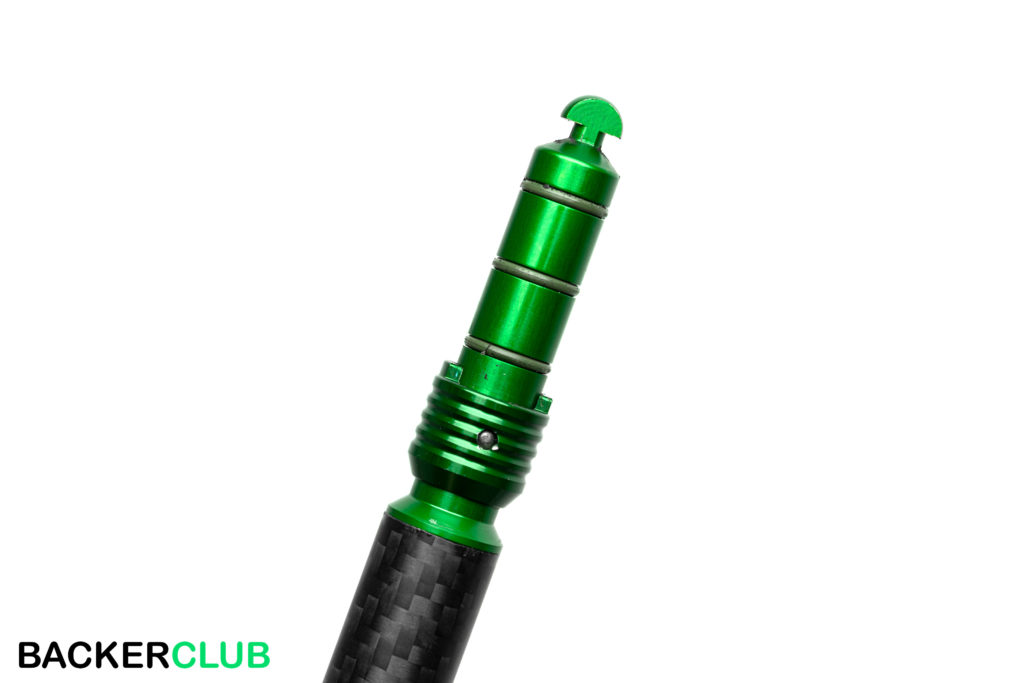
The trekking arrangement, in particular, is extremely straightforward: slip each pole into itself using the ingenious locking mechanism for each male-female joint and adjust for size using the pivot clamp.
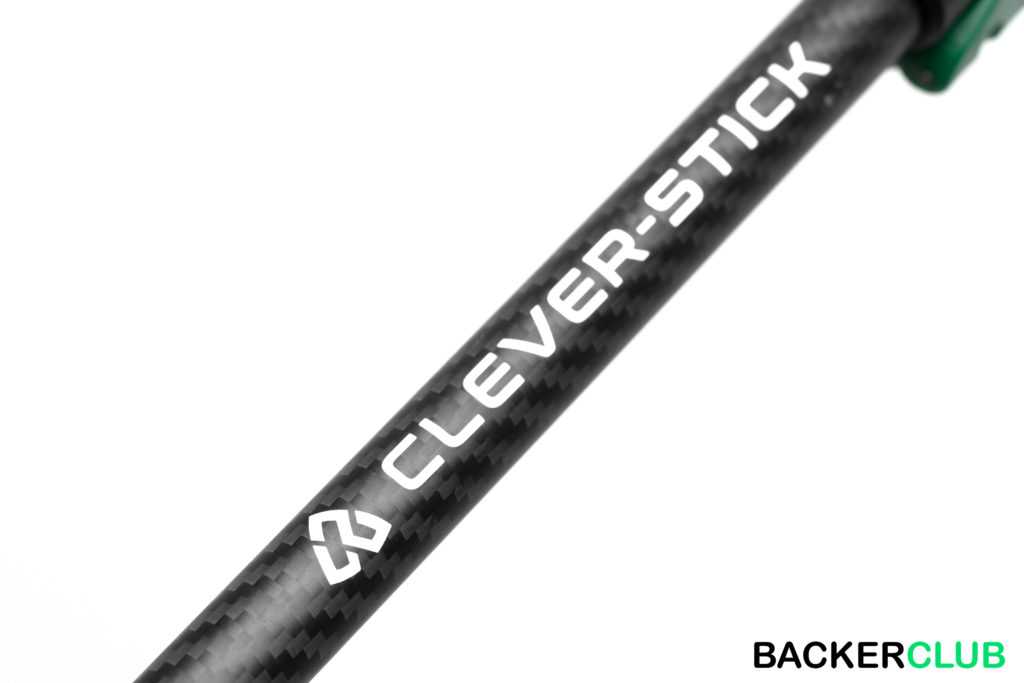
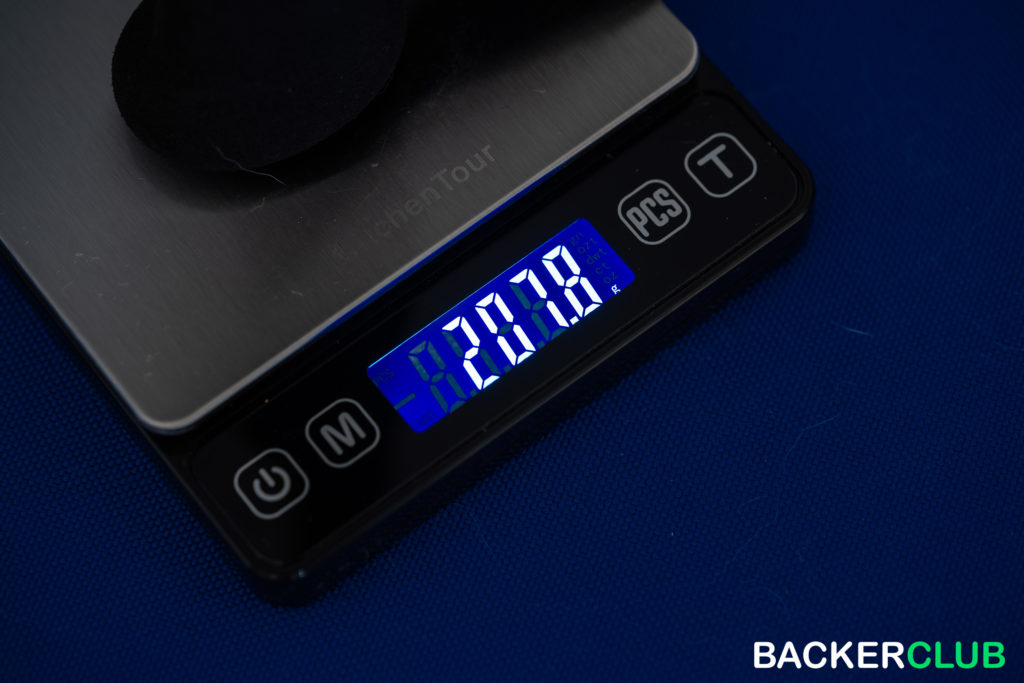
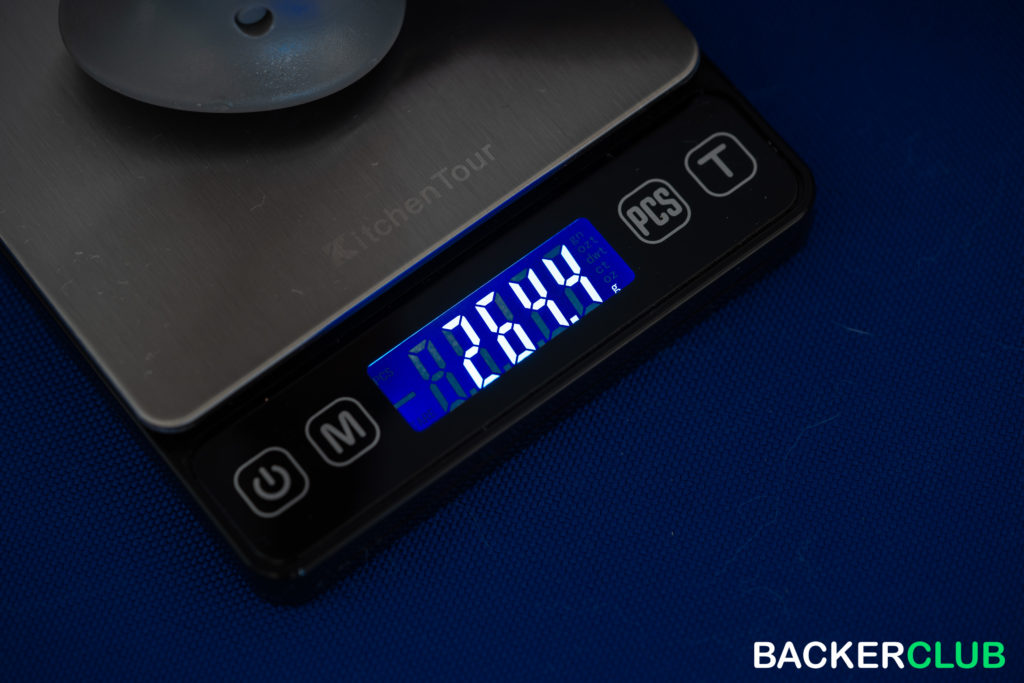
The poles are constructed from carbon fiber and aluminum. The carbon tubes feel like a nice balance between weight and strength. A single pole will weigh about 205-210g in “ready to trek” form, but are strong enough that they survived a car rolling over them. Plus, they look pretty darn good.
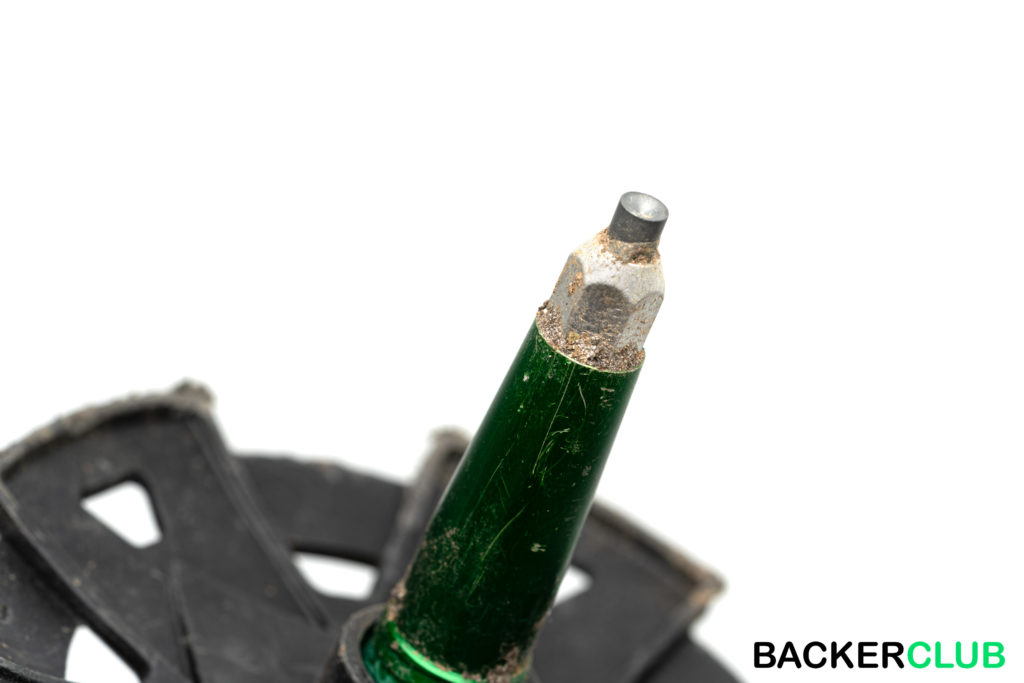
The tip is a typical setup using tungsten carbide and is replaceable (although I doubt we’ll need to do that anytime soon). We have a number of miles on these poles at this point, including asphalt and rock sections, and the tip looks brand new.
How are they as a trekking pole?
In short, they’re really good. If you love numbers, I’ll give them a 4 out of 5 in this category. They certainly check a lot of the important boxes:
- They’ve held up to miles of abuse in a myriad of conditions – clay, mud, creek crossings, rock, gravel, asphalt, & being shoved into cars with 100lbs+ of climbing gear thrown on top.
- The wrist strap is adjustable (but stays secure when you want it to) and is nicely cushioned. On one of our poles, we had a rough stitch that needed to be worn smooth, but otherwise, they’re comfortable for hours at a time.
- The handle is a high density foam that is plenty comfortable and deals with moisture well. If you’re all about the cork handles, rest assured these will do just fine.
- Our long pole variant means we have a wide range of length adjustment – great for my 5 foot self and would easily accommodate a 6’3″+ person.
For reasons I’ll explain further on in my “downsides” section, I don’t want to say they’re out-of-this-world great, but they’re plenty good for most hikers. I would easily recommend them for shorter trips and medium duty use. They understandably sacrifice a bit of trekking performance in favor of their multipurpose form, but we’ll accept this sacrifice every time for our typical hike/climb trips.
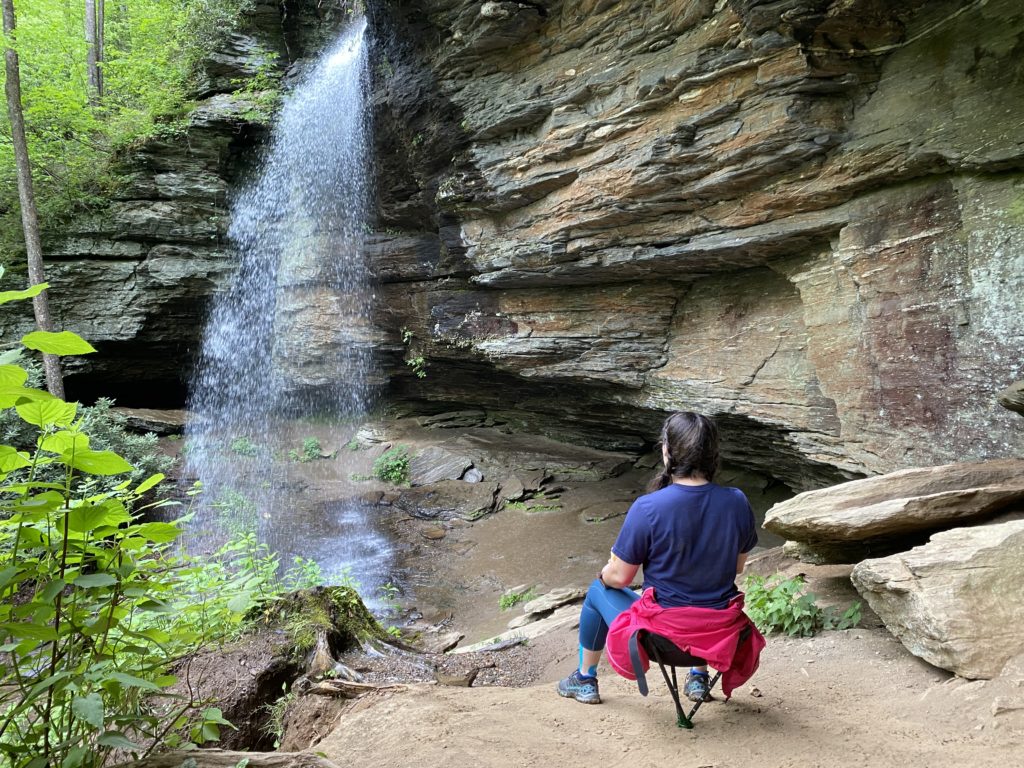
The Seat
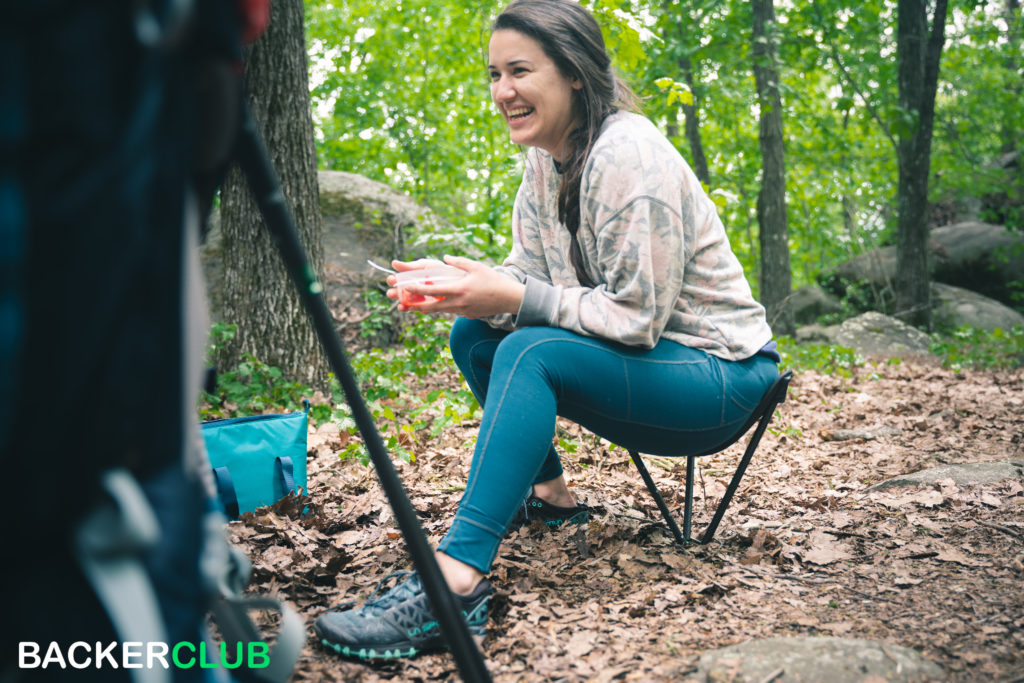
And now on to the reason we wanted these: a place to rest our butts for a hot minute!
Making the seat is fairly easy and we’ve gotten better at it over time. To convert from trekking poles, you start by disassembling the poles into 3 tube sections. This means sliding both pole tubes out of the handles and also removing one of the tips from a tube. From there, you slide the quick-lock mechanism of each tube into the provided “tube joiner” (I have no idea what to call this little aluminum disk). This will give you 3 tube ends at 120 degrees apart to slide the seat fabric on to. This is the hardest part. As you slip each tab of the seat fabric onto a tube’s end, you have to be careful to keep each tube engaged with the “tube joiner” without allowing any other seat tabs to come off a tube. It’s sort of a three way dance that you get better at over time. Quick tip: we hold the circular tube joiner on our torso, tube ends facing away from us, and then slip each tab of the fabric onto a pole, rotating the whole assembly on our torso each time. Doing this forces you to keep positive pressure on the assembly the whole time, thus keeping the sections in the tube joiner and the fabric on the ends.
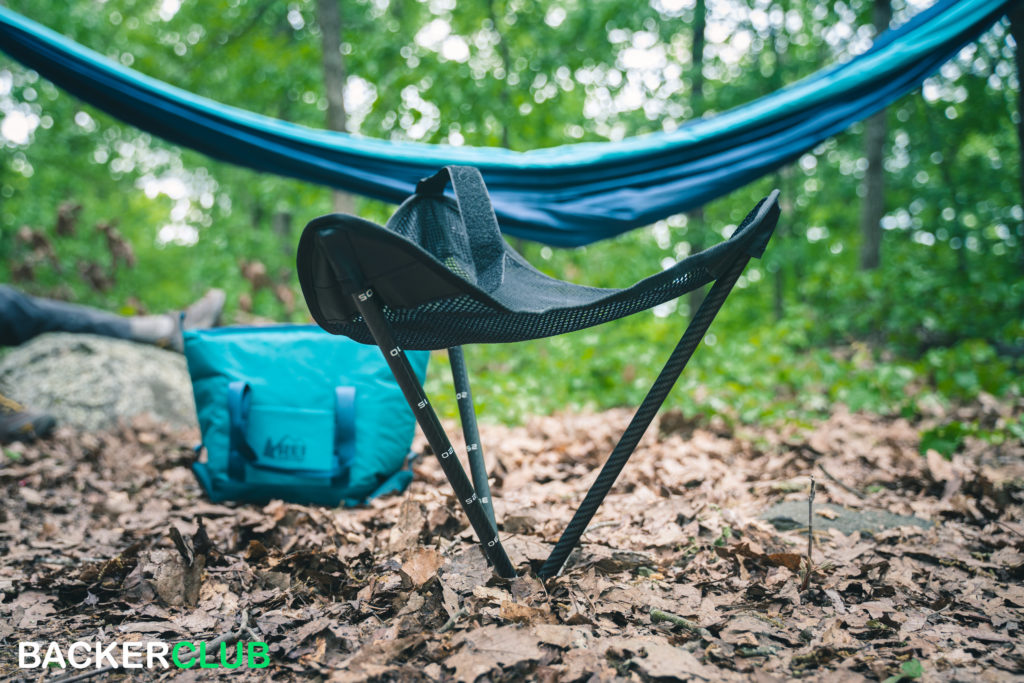
I definitely enjoy the seat to eat lunch or while hanging out by the crag waiting for my turn to climb. It’s not built for campfire comfort but is certainly convenient when you just need a break. I’d recommend finding a rock face or a good tree to lean against as the chair needs a certain amount of balance to keep from toppling over (which is not always my strong suit). You can insert the tip removed from one of your poles into the bottom and then wedge that into the ground for increased stability, but we typically just sit on it without that.
Two Important Considerations for the Seat
- The seat is rated for a max capacity of 200lbs (90kg).
- The seat is pretty small. I’m a little person, so it fits great for me, but larger folk may have different results.
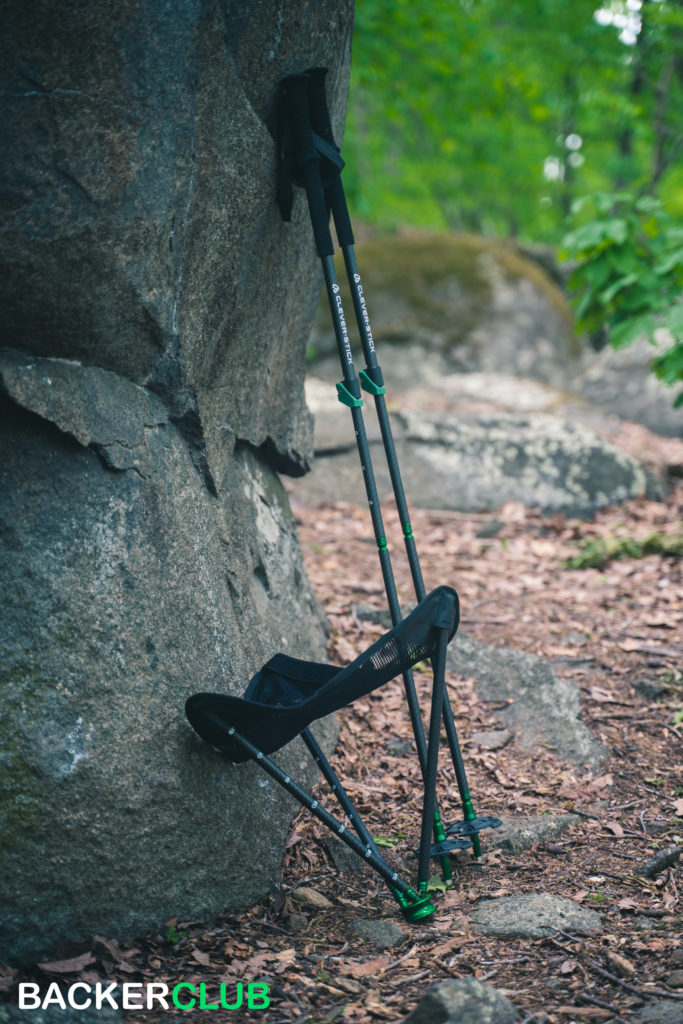
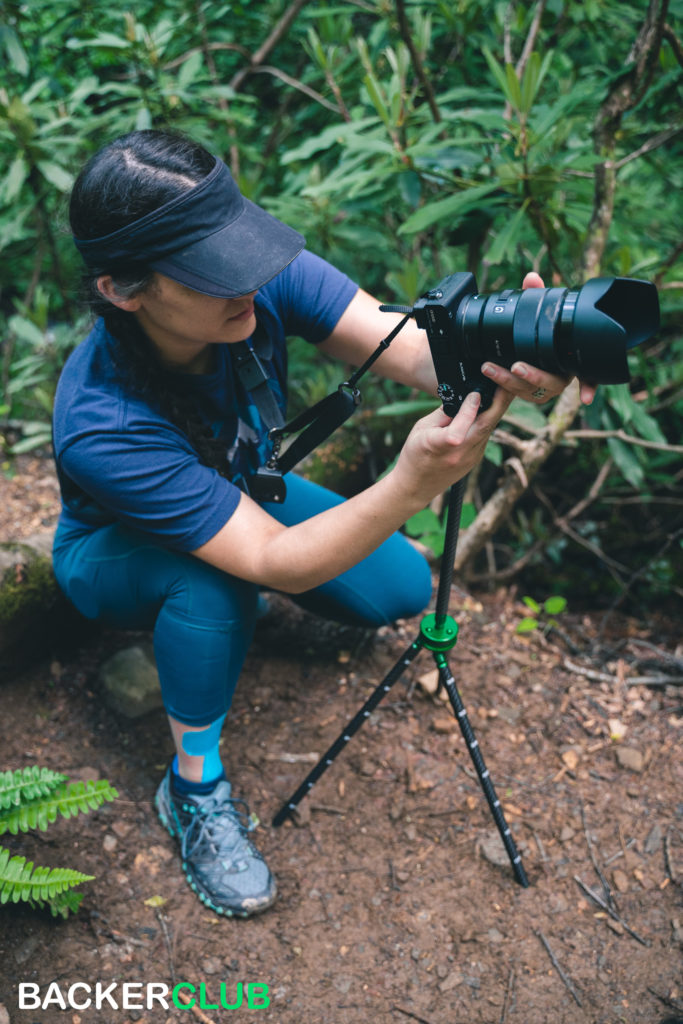
As a Tripod
The tripod is a similar assembly to the seat, but instead of the green “tube joiner” going towards the ground, you invert it into a typical tripod leg orientation and then inset your remaining pole segment point side down into the center hole of the disc.
In the accessories pack are attachments for the camera. One screws into the bottom of the camera just like a normal tripod attachment does, the other is a quick-lock mechanism + GoPro style joint. Put it all together and you have a makeshift tripod.
All in all, its far from a “true” travel tripod like the Peak Design or a Sirui, but in a pinch it does give you more stability than a hand held shot or would allow you to get that group photo that may be impossible otherwise. If the purpose of your hike is photograhpy, clearly you’ll want a dedicated tripod for your efforts, but the random ability to place a camera or cell phone on your trekking pole is a neat “fun to have” feature.
The selfie stick is another “fun to have” option. Like other selfie sticks, it comes with a holder you simply click your phone into. It’s a spring-loaded holder that just fits my iPhone 11 Pro Max in width, and I have to remove my case that also holds 2 credit cards on the back for it to work.
As a BackerClub member, we received a freebie selfie stick remote per the Special Perk offered by the creator. The remote works like a charm with my iPhone – a 5 second setup with Bluetooth, open the camera app, and snap away.
We don’t have any photos of the poles as a selfie stick, because, well, we don’t do selfies… lol.
The Downsides
Now that I’ve talked about several of the benefits for the Clever Sticks, its time to discuss some cons:
Temporarily storing the poles on your pack
There are times when you’re hiking that requires you to put your poles away temporarily; for instance, you need to do some rock scrambling that requires two handed contact. Normally, you’d just toss the poles on the back of your pack, probably using the dedicated trekking pole loops. Unfortunately, if you keep the Clever Sticks in “ready to go” form but collapse them entirely, they’re still pretty long and stick out way above the top of the pack. I’m sure the regular length version would be better in this regard than the long variants we purchased, but the ultimate cause of the problem is that each section of the pole isn’t telescoping with the next. You can slide one tube section into the handle, but that’s it. As a consequence, we find ourselves needing to disassemble the poles down even further and store one or more tube sections into the backpack compartment. Is this the end of the world? Nah, but still not as convenient as a typical double-telescoping pole.
The handle clamp
My other gripe is the clamp used to control the length of the poles when trekking. It’s made from plastic and has routinely loosened itself from clamp/unclamp cycles. As a result, we’re constantly tightening the screw before a hike to ensure all’s well. On our second hike with the poles, the screw became so loose that I couldn’t put any downward pressure on the pole without collapsing it. Luckily, my husband always hikes with a Leatherman so we were able to fix it in the field.
In theory, you could use these poles for light duty skiing or snow walking, but I’m not sure how much I’d trust that. When the screw is tight, I can put a decent amount of pressure on the pole before it slides (maybe 30-40lbs), but I think you’d want a more secure setup for heavy duty use where you’re putting a LOT of weight on your poles.
Heads up – I’ve always used twist-lock style poles (even for my travel tripods), so I don’t have much experience with level clamps on traditional trekking poles for comparison.

Slop in the quick-lock mechanism
The quick-lock mechanism is awesome but does have a potential downside. If the mating diameters from one of the mechanisms into a tube section aren’t perfect, you’ll have slop (or wobble) as you use the pole. I say “potential”, as only 1 of our 4 poles exhibits this behavior. On the others, the locking mechanism is tight enough that you don’t notice any slop unless you’re really looking for it. However, on the one, there’s maybe 1/16 to 1/8 inch of wobbly from handle to tip (when extended for normal use). Does this have any negative impact when using the pole? Nope. It’s more of a silly annoyance that you notice when standing still and simple shifting your pressure on the handle of the pole.
Availability & Price
Have you seen these at your local REI? Yea, I didn’t think so. Stuff that’s really cool doesn’t do you much good if you can’t get it. As far as I know, these poles are currently available only from the creator and their online store and are priced at 230CHF (about $240USD at the time of writing). This makes them some of the most expensive trekking poles I’ve come across.
Furthermore, accidents happen and trekking poles break. Shoot – I wrecked my Kelty’s after 10 minutes of use after slipping on a wet rock. In the Kelty’s case, I was able to exchange it at my local REI and off I went. However, if we need to replace something for our Clever Sticks, we’ll have to hope we can get it from the manufacturer, which happens to be halfway around the world in Switzerland. Have we had a reason to test out the availability of replacements? Not yet.
Perhaps one day these will have ubiquitous availability, but for now, it’s certainly something to consider.
Conclusion – We Have a Winner
Perfect at none, good at all.
In reading this article, you’ve probably picked up on the conclusion here already: the Clever Stick isn’t the best trekking pole out there, nor the best seat, nor the best tripod, nor the best selfie stick. However, it does each of those things with merit, and that means it’s the best hiking companion that can do all of those things.
For us, this is precisely what we were hoping to find. We’ve always used trekking poles for our hiking, and we’ve always wanted a simple seat while on the hike. However, we’ve never wanted to carry each of those things independently. Enter the Clever Stick. By adding a piece of fabric and small aluminum disc to our bags, we have these 2 things (and more!) at our disposable.
In other words, I’d consider the Clever Stick to be a fully capable trekking pole that happens to let you do a lot more with it. It’s like having a yummy cake and pairing it with scrumptious icing. Would the cake be good on its own? Sure. Does the icing alone make a fantastic dessert? Perhaps. But do both together give you exactly what you’re searching for? You bet.
If you’re in the market for trekking poles and like us, are primarily using them for shorter, light duty trips, I’d definitely recommend giving them a close look.